

A professional roof replacement follows a clear, step-by-step process designed to protect your home while delivering a durable new roof. While the project can be noisy and disruptive for a short time, homeowners who know what to expect are often far more comfortable throughout the experience. From the initial inspection and material delivery to tear-off, installation, and final cleanup, understanding each stage of the process can help you prepare and avoid surprises.
Many homeowners begin their search with established companies such as Galloway Roofing, but regardless of the contractor you hire, understanding the replacement process can help you prepare and avoid surprises.
-
Inspection, Planning, and Material Delivery
Roof replacement begins with an inspection and detailed estimate. Once the project is approved, the contractor schedules the work, secures any necessary permits, and orders materials.
In many cases, shingles, underlayment, vents, and flashing materials arrive a day before the project begins. Your contractor should explain the expected timeline and discuss how weather conditions could affect scheduling.
-
Protecting Your Property
Before any roofing materials are removed, the crew should take steps to protect your property. This includes placing tarps over landscaping, covering vulnerable areas, and creating designated work zones around the home.
A professional team will have a plan to minimize safety risks and keep the worksite organized. Clear preparation helps reduce the chance of damage to siding, windows, gardens, and outdoor spaces.
-
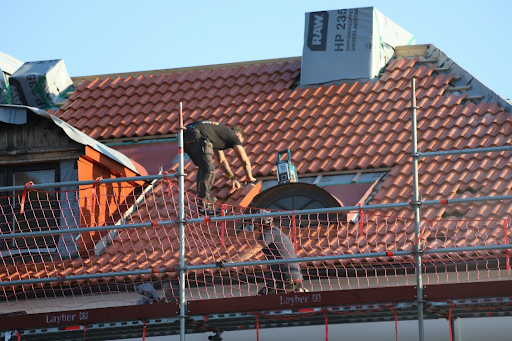
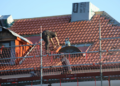
Removing the Old Roof
The tear-off phase involves removing existing shingles and underlayment to expose the roof deck underneath. Once exposed, the decking is carefully inspected for signs of rot, moisture damage, or structural issues.
If any damaged sections are discovered, they should be repaired or replaced before installation continues.
-
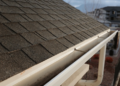
Installing the New Roofing System
After the deck is confirmed to be in good condition, installation begins. The process starts with underlayment, followed by flashing around roof penetrations such as chimneys and vents.
The final layer consists of shingles or another selected roofing material. If you’re installing asphalt shingles, it’s normal for them to appear slightly uneven immediately after installation. They generally settle and seal properly after exposure to sunlight and warmer temperatures.
-
Cleanup and Site Maintenance
Professional roofing crews don’t wait until the project is finished to start cleaning. Throughout the installation, debris is usually collected and removed to keep the property safer and more organized.
Old shingles, nails, packaging materials, and other waste should be removed regularly. Many contractors use magnetic sweepers to collect stray nails and perform thorough cleanup before leaving the site.
-
Final Walkthrough and Inspection
Once installation is complete, your contractor should conduct a final walkthrough with you. This is an opportunity to review the completed work, discuss warranties, and ask questions about maintenance or future inspections.
A good contractor will explain any details homeowners should know during the first few weeks after installation and address any concerns before the project is officially complete.
Final Takeaways
- Roof replacement follows a structured, predictable process.
- Materials and equipment often arrive before work begins.
- Property protection should be a priority from day one.
- Roof decking is inspected before new materials are installed.
- Cleanup should happen throughout the project, not just at the end.
- A final walkthrough helps confirm quality and workmanship.


